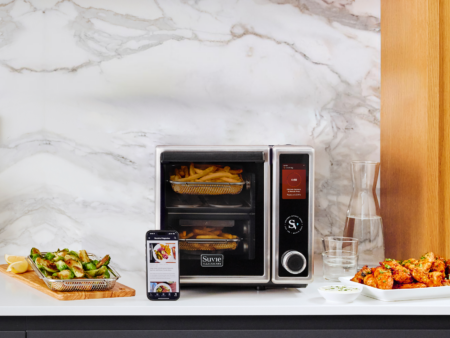
Welcome to Suvie! We’re excited to have you join us in a movement to revolutionize dinner together, so that you and your family can eat gourmet meals that are ready whenever you are.
This Quick Start Guide, we will walk you through all of the details you need to know to get your Suvie set up and cooking quickly! Be sure to visit our recipe blog as well for delicious meals.
If you have any questions at all, please email our customer support team at help@suvie.com.
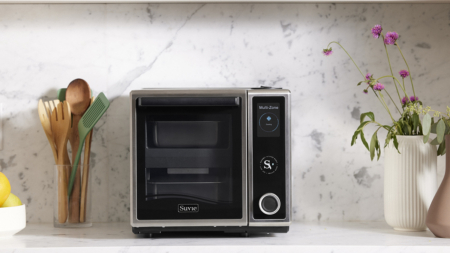
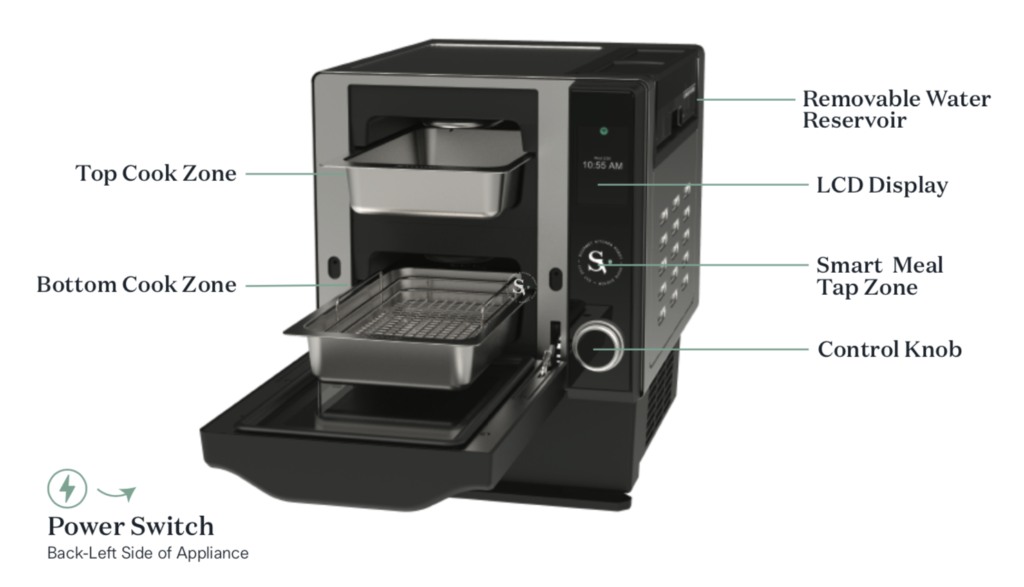
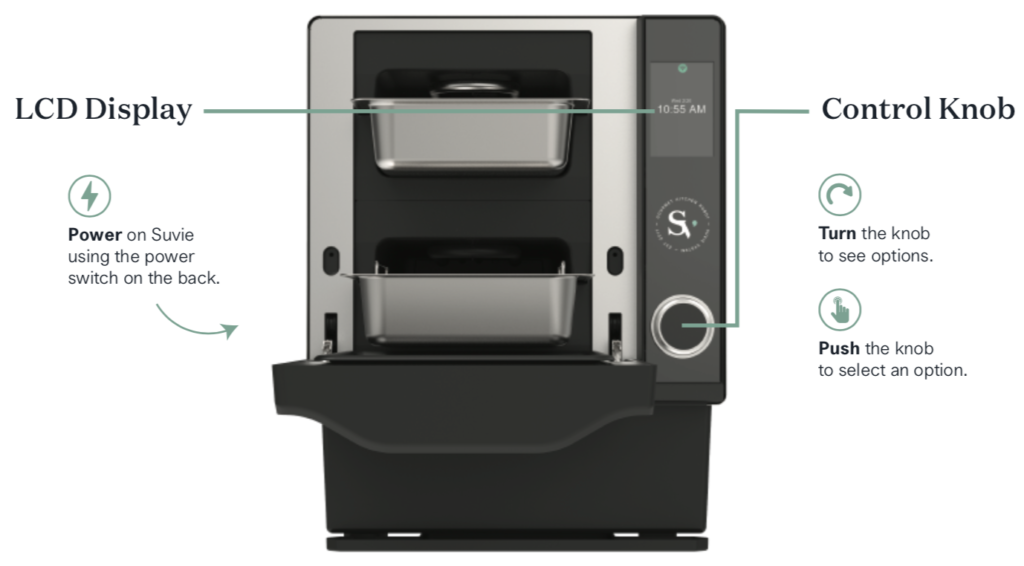
Getting to Know Your Suvie
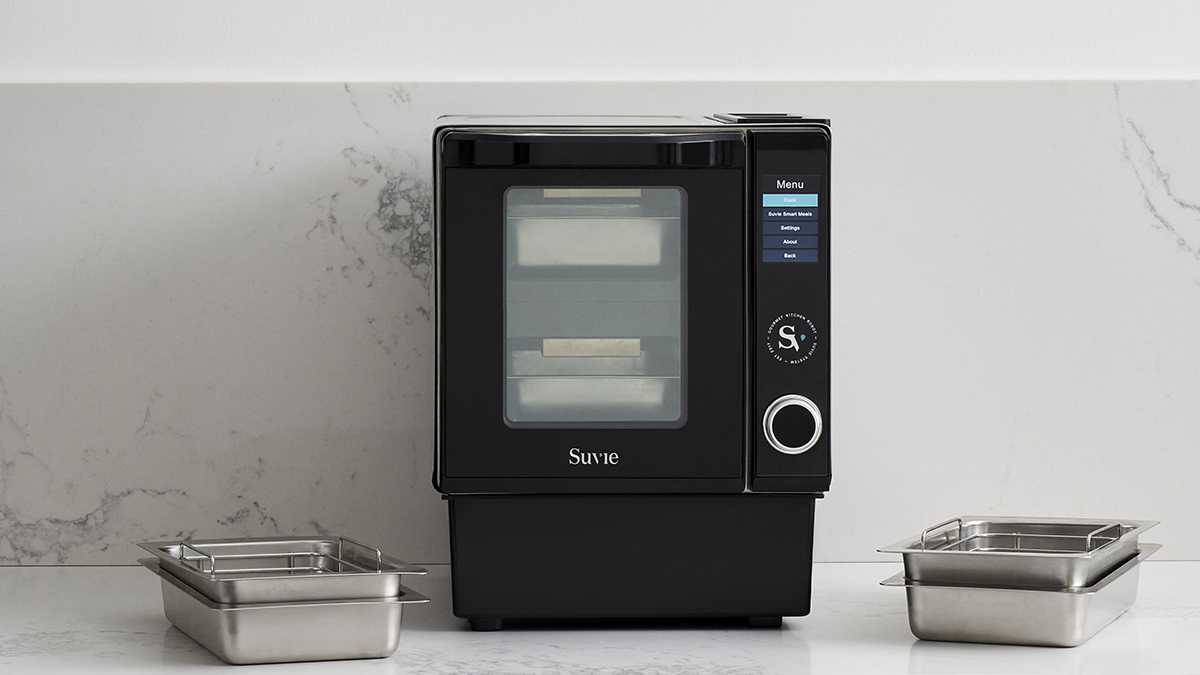
Suvie features two cooking zones that independently refrigerate and cook your ingredients. Please be aware that some cooking functions require the reservoir to be filled with water prior to cooking. Suvie will prompt you to fill the reservoir when needed.
What’s Included?
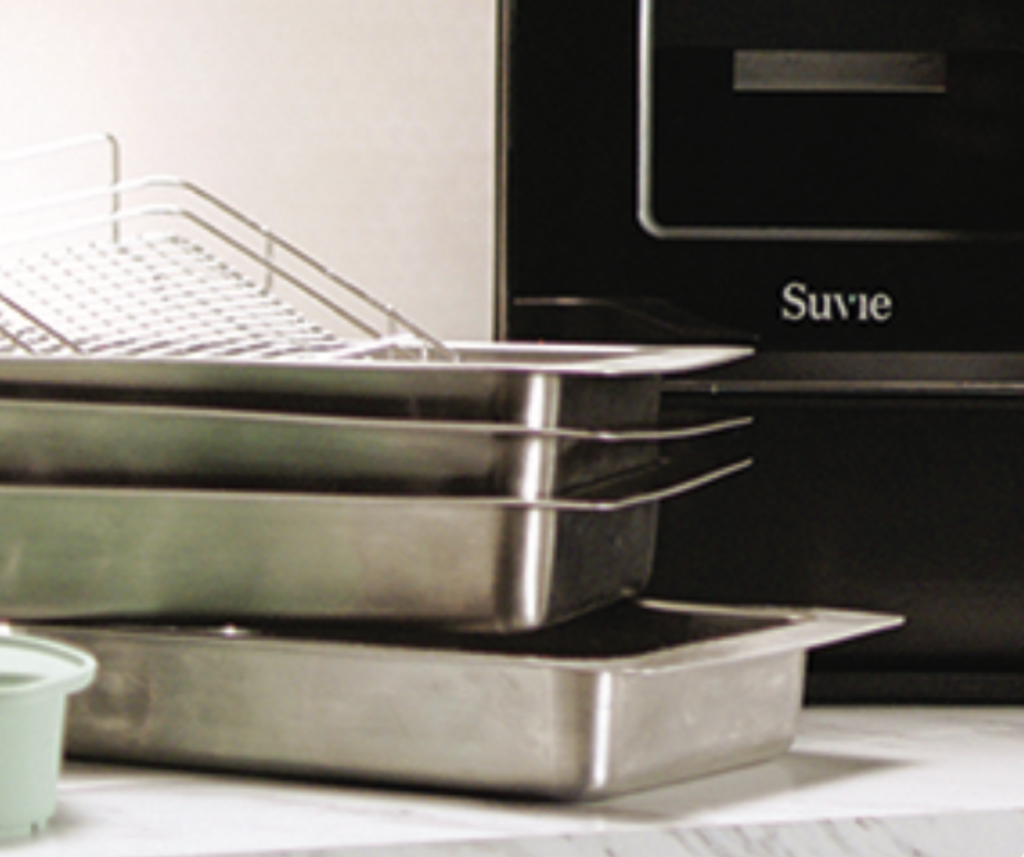
Suvie includes two food pans that are dishwasher safe, as well as a roasting rack designed for perfectly roasted proteins and vegetables.
Available Add-Ons
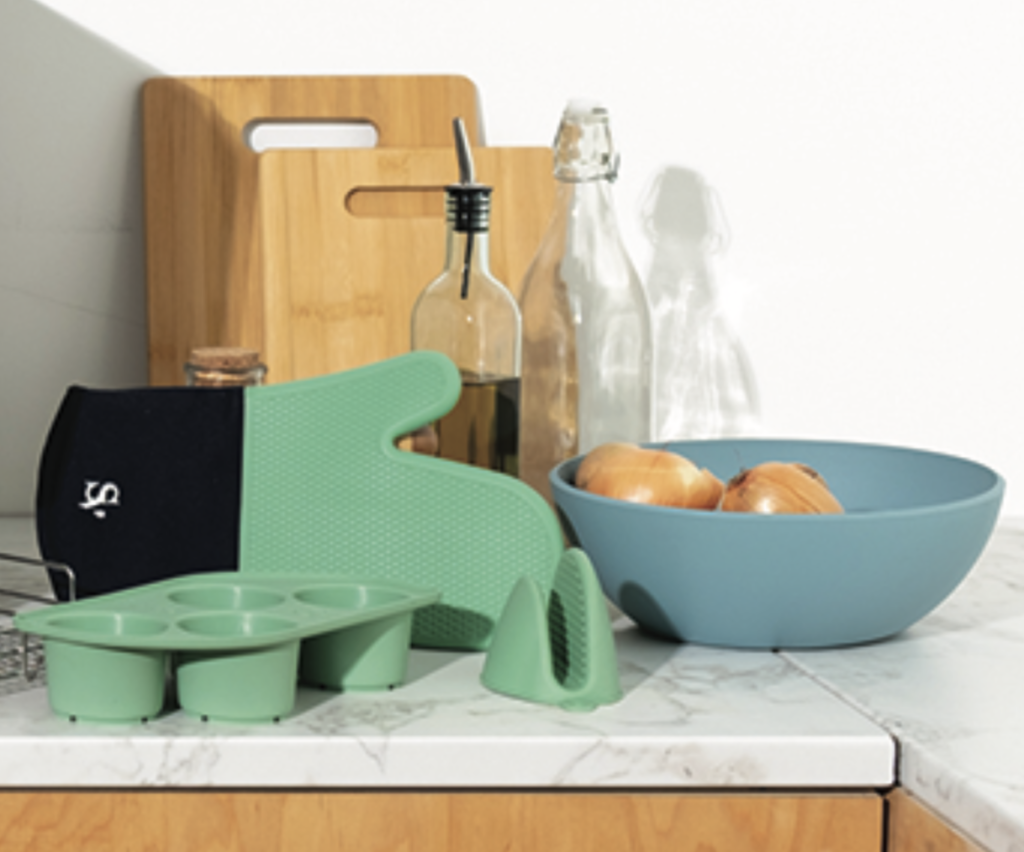
Our optional accessory kit is available at store.suvie.com and includes: an egg tray, silicon oven mitt and pan grabber.
Countertop Placement
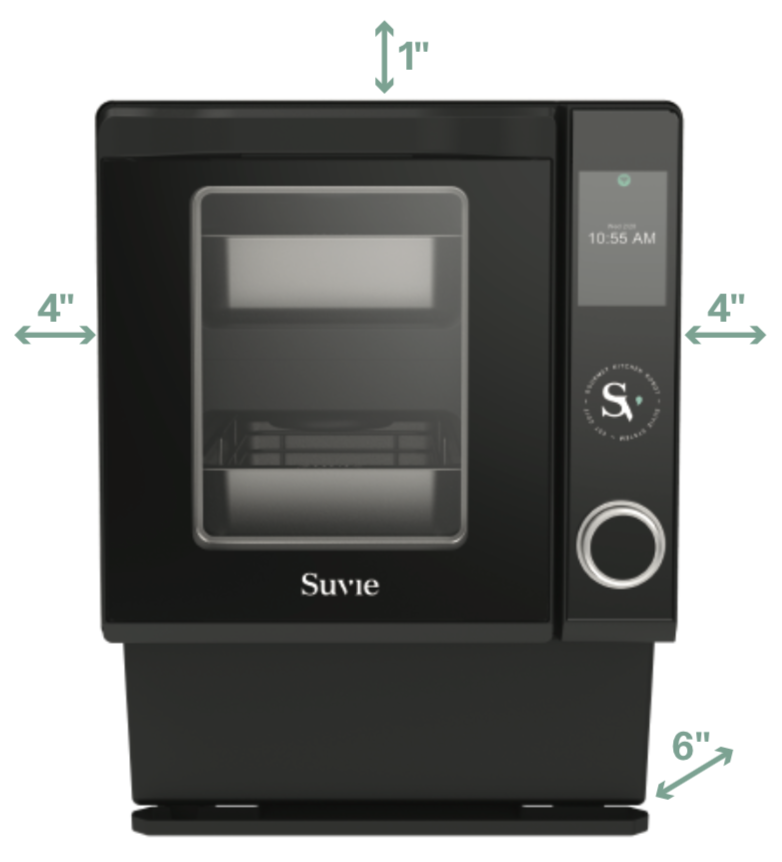
For optimal performance we recommend that you place your Suvie on a solid, flat, countertop surface that can withstand moisture. Do not install in an enclosed cabinet.
After unboxing, allow Suvie to sit upright for 24 hours before refrigerating to allow the refrigerant to settle.
- Leave 6″ from the back
- Leave 4″ from the left and right side
- Leave 1″ from the top
Use in a room that is 75° F or cooler.
Quick Setup
Once setup is complete, you can begin cooking right away. Questions about setting up your Suvie? Please email us at help@suvie.com.
Filling the Water Reservoir
Suvie uses water to indirectly refrigerate and cook your ingredients with some cooking functions.
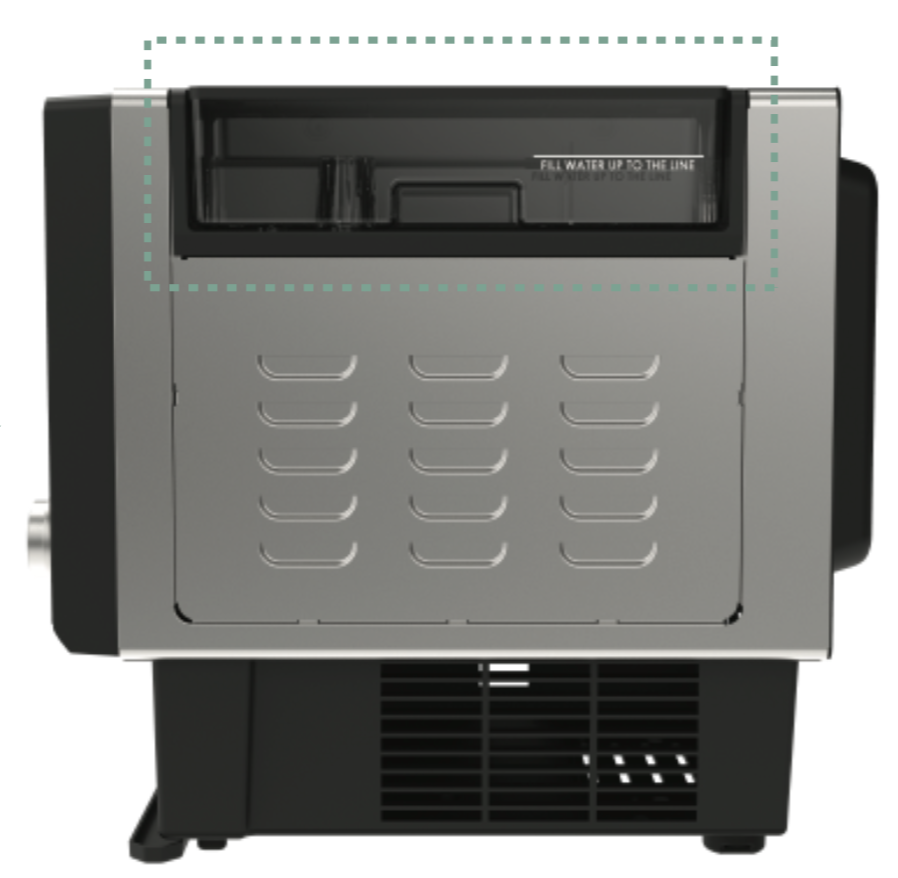
Fill ONLY WHEN PROMPTED on display with DISTILLED WATER to the fill line indicated.
FOR OPTIMAL PERFORMANCE, WE RECOMMEND ONLY USING DISTILLED WATER.
WARNING: The water in the reservoir will steam, bubble, and get hot while cooking. This is normal and expected while in operation. Do not touch the reservoir while it is in use.
Cooking Suvie Meals
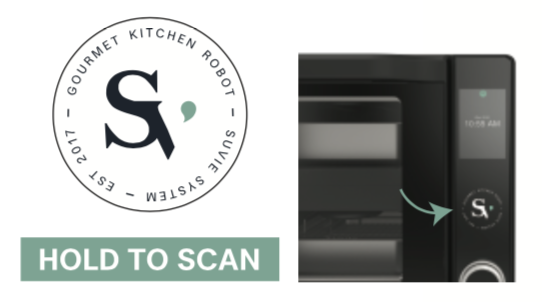
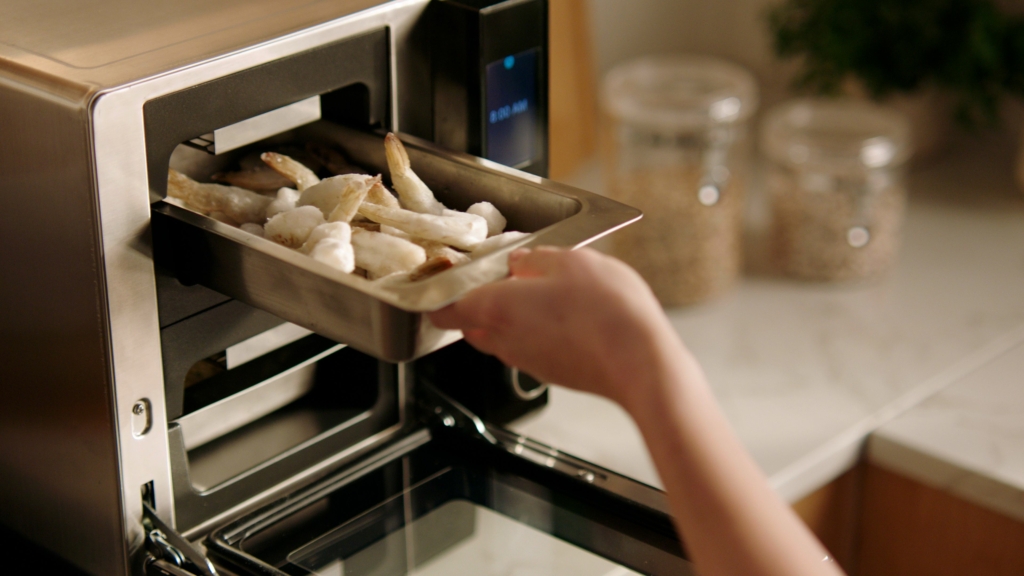
Step 1: Locate the meal card provided and follow the simple loading instructions.
Step 2: Hold the meal card directly on the Tap Zone to load the recipe onto your Suvie. When successful, you will hear a beep and see the recipe name appear on the display.
Step 3: When prompted, fill the water reservoir with distilled water to the fill line indicated. Not all functions will require water.
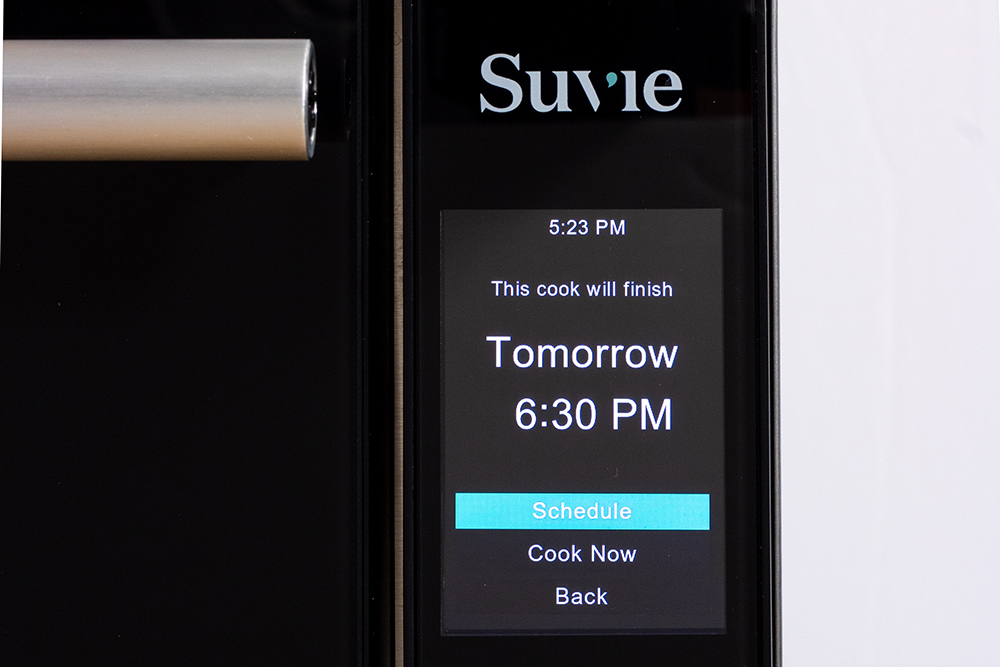
Step 4: Select Cook Now to begin cooking right away, or schedule it to finish at a later time.
Step 5: Once your meal finishes cooking, you may choose to broil it for added quality and appearance.
Cooking from Frozen? Simply select “yes” when prompted on the display.
Cooking With Your Own Ingredients

Step 1: Turn the control knob and select the My Cook option.
Step 2: Choose your desired BOTTOM ZONE function and enter the time/temp settings when prompted. Then, load your ingredients into the bottom zone.
Step 3: Choose your desired TOP ZONE function and enter the time/temp settings when prompted. Then, load your ingredients into the top zone.
Step 4: When prompted on the display, fill the reservoir with distilled water to the fill line indicated. Not all functions will require water.
Step 5: After your meal has finished cooking select broil for added quality & appearance.
Cooking from Frozen? Simply select “yes” when prompted on the display.
Cooking from Frozen
Suvie can automatically thaw frozen ingredients prior to cooking, so there is no need to defrost your meal beforehand.
After selecting your cook function, Suvie will prompt you on the display and ask if your ingredients are frozen. Simply select “yes” and Suvie will adjust its settings automatically.
Cooking Suvie’s rapid Suvie Cook meals? Simply scan your meal card and Suvie will rapidly thaw your ingredients and then cook your meal in as little as 25 minutes.
Scheduled vs. Cool-to-Cook Functions
Cooking functions that use the broilers require your presence to start. For this reason, you can not schedule some cooking functions in advance.
Ingredients can still be refrigerated until you are home to begin cooking using a simple button-press start.

Button-Press-Start Functions
Cook functions that require the use of the broilers do require your presence to start. Suvie will keep your ingredients refrigerated until you press Cook Now on the display.
Button-Press Functions Include:
- Roast
- Bake
- Broil
- Rapid Cook Suvie Meals
Auto-Start Functions
Cook functions that do not use the broilers, and only use water to indirectly cook, can start automatically without your presence. Simply schedule your meal and Suvie will know when to switch from refrigerating to cooking.
Auto-Start Functions Include:
- Sous Vide
- Slow Cook
- Steam
- Reheat
- Egg Mode
- Proof
For more information on scheduled vs non-scheduled functions, visit our guide here.
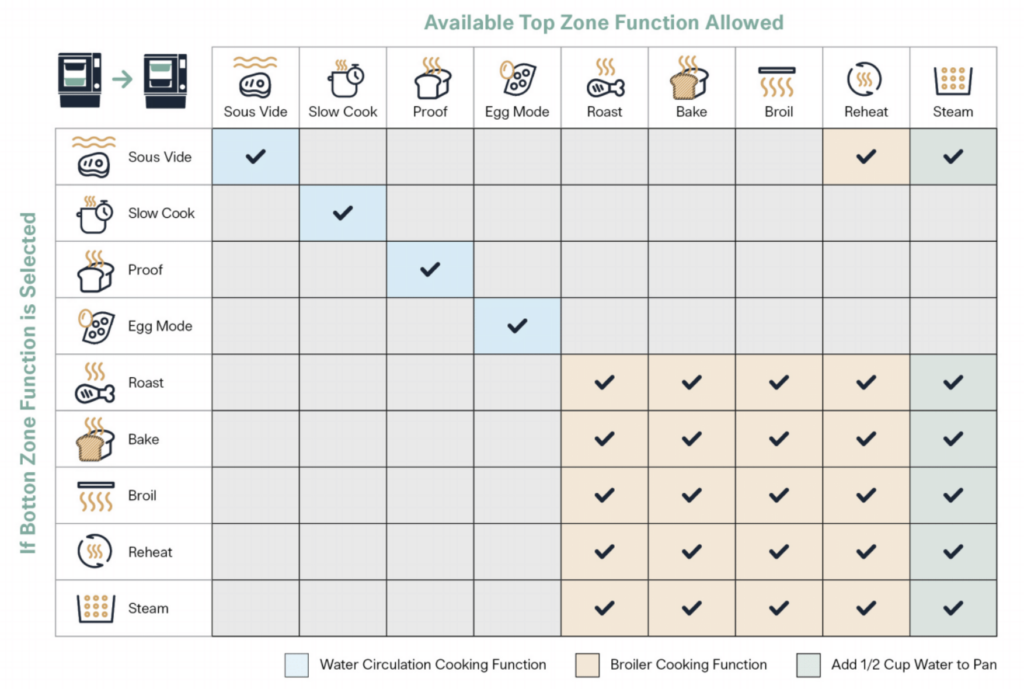
Multi-Zone Performance
Both the top and bottom cooking zone can perform all cooking functions, however some may not be used in combination with another. Due to heat energy transfer, you must select your desired cook function in the bottom zone first.
After selecting the bottom zone function first, Suvie will display all top zone functions that are available.
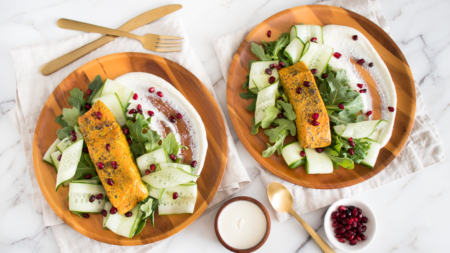
Roast Function
High temp roasting is ideal for crispy vegetables and perfect meats, fish and other proteins.
- Place the roasting rack into the Suvie pan.
- Remove ingredients from packaging and place on top of the roasting rack.
- Select the Roast function and enter the desired temperature and time when prompted.
View Time/Temp Charts + Roasting Tips >>
Bake Function
Bake mode uses more even heat for cakes and gentler cooing, perfect for your favorite desserts and casseroles.
- Place the roasting rack into the Suvie pan.
- Remove ingredients from packaging and place inside the Suvie pan.
- Select the Bake function and enter the desired temperature and time when prompted.
View Time/Temp Charts + Baking Tips >>
Broil Function
Crisping function adds a gorgeous finish to your meal using the top broiler heating elements.
- Place the roasting rack into the Suvie pan.
- Remove ingredients from packaging and place on top of the roasting rack.
- Select the Broil function and enter the desired broil time when prompted.
View TimeTemp Charts + Broiling Tips >>
Slow Cook Function
Low, slow, and hands-off cooking for soups, stews, short ribs and other tougher cuts of meat.
- Remove ingredients from packaging and place into a Suvie pan.
- Fill the water reservoir to the fill line indicated.
- Select the slow cook function and choose either a low temperature (185° F) or a high temperature (205° F) and your desired cook time (up to 12 hours).
IMPORTANT: When cooking using the slow cook function in both the top and bottom zones concurrently, these must both cook at the same high or low temperature.
Visit More Slow Cook Tips & Instructions >>
Sous Vide Function
Water-based cooking for perfect proteins cooked at a low temperature for a long duration of time. Impossible to overcook!
- Ingredients MUST be vacuum-sealed to cook using the sous vide method.
- Place vacuum-sealed proteins into the Suvie pan.
- Fill the Suvie pan with water until the vacuum-sealed proteins are fully submerged.
- Fill the water reservoir to the fill line indicated.
- Select the Sous Vide function and enter the desired cooking temp & time settings.
IMPORTANT: When cooking using the sous vide function in both the top and bottom zones concurrently, these must both cook at the same temperature.
View Time/Temp Charts + Sous Vide Tips >>
Steam Function
Gently cook fish, prepare veggies without oil, or steam dumplings.
- Place the roasting rack into the Suvie pan.
- Remove ingredients from packaging and place on top of the roasting rack.
- Select the Steam function and enter the desired steam time when prompted.
TIP: After steaming if you’d still like a signature roasted finish we recommend brushing or tossing a little bit of natural oil and broiling for 5-10 minutes depending on your preference.
View More Steaming Tips & Instructions >>
Reheat Function
Suvie uses it’s gentle pan heaters to reheat your food and hold it at a temperature of up to 140° F for up to 4 hours.
- Remove ingredients from any packaging and place into Suvie pan.
- Fill the water reservoir to the fill line indicated.
- Select the Reheat function and enter your desired reheat time up to one hour.
Visit More Reheating Tips & Instructions >>
Eggs
With the optional egg tray, cook your most creative egg breakfast options.
- Place egg tray directly into Suvie pan.
- Crack eggs or pour egg mixture into egg tray.
- Fill the pan with water surrounding the egg tray before placing it into Suvie.
- Fill reservoir with water to the fill line.
- Select egg cooker function and enter your desired cook time.
View More Egg Cooking Tips & Instructions >>
Proof Function
Suvie gently circulates water at the perfect temperature to activate yeast in your dough, prior to baking.
- Remove ingredients from packaging and place in Suvie pan.
- Fill reservoir to the fill line indicated.
- Select proof function and enter your desired proof time up to one hour.
View More Proofing Tips & Instructions >>
Caring For Your Suvie
Cleaning and maintaining your Suvie is designed to be an absolute breeze, as long as you follow these simple tips.
- Always use distilled water when filling the water reservoir to avoid scale buildup.
- After Suvie cools down, wipe down the exterior and interior with a sponge and soapy water, dry completely.
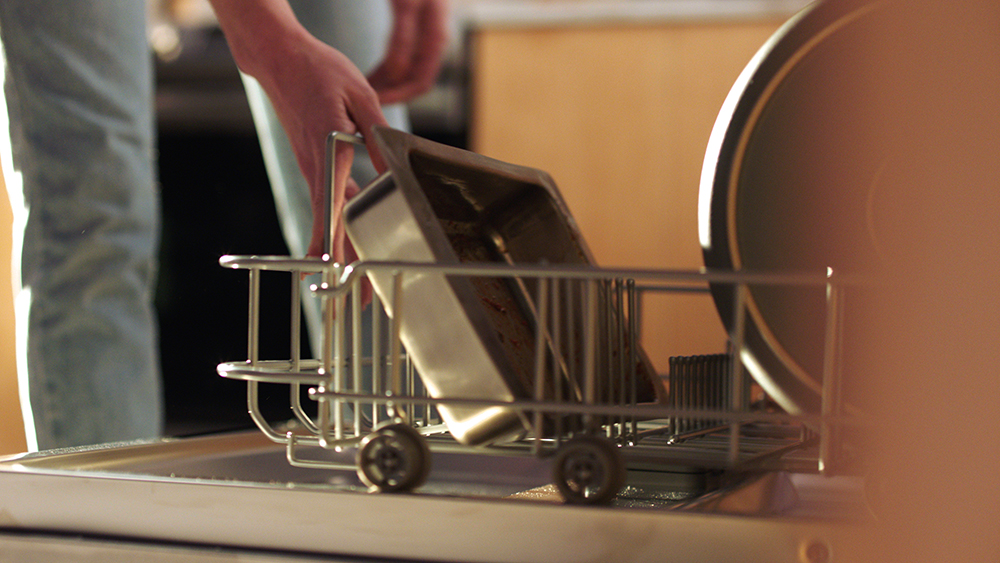
- Suvie pans can be easily cleaned in your dishwasher.
IMPORTANT: Do not use alkaline-based cleaning products, like bleach.
View Additional Cleaning & Descaling Instructions >>.